Ultralight hiking gear checklist planning transforms your outdoor experience from a burden-carrying slog into pure trail magic. When you shed unnecessary weight, every step becomes easier, every mile more enjoyable, and every summit more achievable.
Here’s what ultralight hiking really means for your adventures:
- Base weight under 20 pounds (excluding food, water, fuel)
- 50% less fatigue on long hiking days
- Faster recovery between hiking sessions
- Greater range and flexibility in trip planning
- Reduced risk of overuse injuries from heavy loads
The difference isn’t just physical—it’s psychological. When your pack feels manageable, you focus on the landscape instead of your aching shoulders.
What Is Ultralight Hiking and Why It Matters
Ultralight hiking represents a philosophy shift from “bringing everything you might need” to “bringing exactly what you do need.” It’s not about suffering or cutting safety corners—it’s about intelligent gear selection and understanding the difference between wants and needs.
The magic number? Most ultralight advocates target a base weight under 20 pounds. Base weight excludes consumables (food, water, fuel) and includes only your gear that goes home with you.
The Big Four: Where Weight Savings Matter Most
Shelter System (Target: 1-3 pounds)
Your shelter typically represents 15-25% of your total pack weight. Traditional tents weigh 4-6 pounds, while ultralight options come in under 2 pounds.
Smart swaps:
- Replace heavy tent with trekking pole shelter
- Choose single-wall designs over double-wall
- Consider tarp-and-bivy combinations for experienced hikers
Sleep System (Target: 2-4 pounds)
Sleeping bags and pads traditionally weigh 3-6 pounds combined. Ultralight versions can slash this to under 3 pounds total.
Weight-saving strategies:
- Down insulation over synthetic (when conditions allow)
- Torso-length pads instead of full-length
- Quilt systems instead of traditional sleeping bags
Backpack (Target: 1-3 pounds)
A traditional backpack weighs 4-6 pounds before you put anything in it. Ultralight packs weigh 1-2.5 pounds but require careful packing and lighter loads to function properly.
Key considerations:
- Frameless packs for loads under 30 pounds
- Minimal padding and features
- Proper fit becomes even more critical
Clothing System (Target: 2-4 pounds total)
This is where many hikers overlook massive weight savings. Traditional hiking clothes can weigh 6-10 pounds, while ultralight clothing systems clock in around 3-4 pounds.
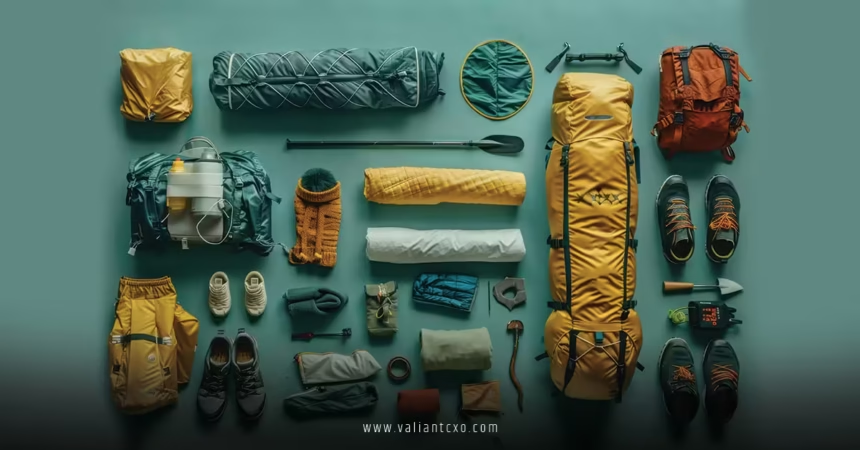
Complete Ultralight Hiking Gear Checklist
Shelter & Sleep (5-7 pounds total)
- Shelter: 1-2 lb trekking pole tent or tarp
- Sleeping pad: 8-16 oz closed-cell or ultralight inflatable
- Sleep system: 1.5-2.5 lb down quilt or lightweight bag
- Pillow: 1-3 oz inflatable or stuff sack design
Clothing System (3-5 pounds total)
- Base layer: 3-5 oz merino or synthetic top and bottom
- Hiking clothes: 4-8 oz lightweight shorts and breathable shirt
- Insulation layer: 8-12 oz down or synthetic jacket
- Rain gear: 6-10 oz ultralight shell jacket and pants
- Extra socks/underwear: 2-4 oz merino wool options
- Hat and gloves: 2-4 oz lightweight options
Hiking Pants: The Critical Middle Layer
Here’s where smart gear selection really pays off. The best lightweight parachute pants for hiking 2026 represent perfect ultralight thinking—they weigh just 4-6 ounces while providing wind protection, quick drying, and packability that traditional hiking pants can’t match.
These pants work as your primary hiking layer in mild conditions, a wind shell over base layers in cold weather, or emergency backup pants that pack smaller than a sandwich. At under 6 ounces, they’re lighter than most hiking shorts while offering more versatility.
Navigation & Safety (1-2 pounds total)
- Map and compass: 2-4 oz traditional navigation tools
- GPS device or phone: 3-8 oz with backup battery
- First aid kit: 3-6 oz customized to trip length
- Emergency shelter: 1-3 oz space blanket or bivy
- Fire starter: 1 oz waterproof matches or lighter
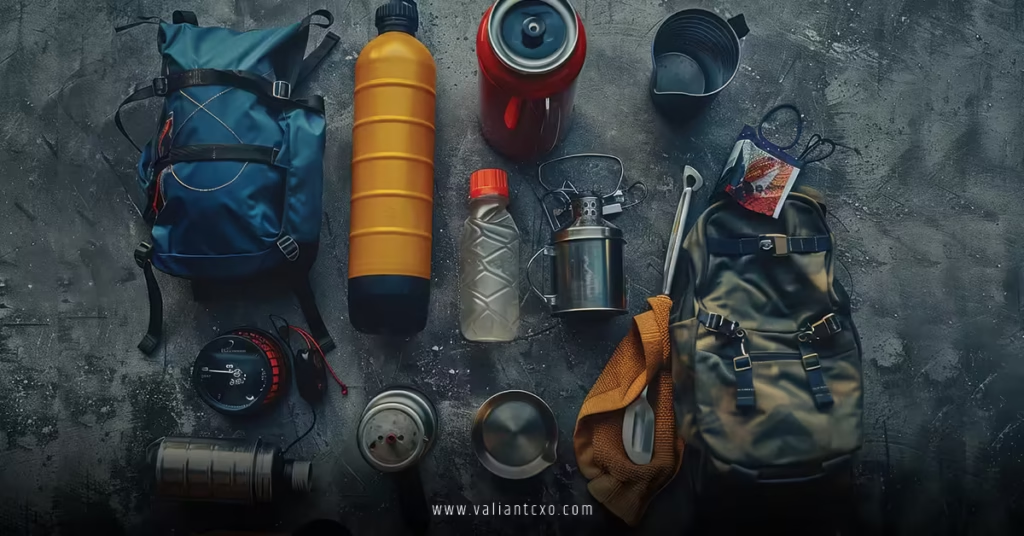
Cooking & Hydration (1-3 pounds total)
- Stove: 1-3 oz ultralight canister or alcohol stove
- Pot: 3-6 oz titanium or aluminum cookpot
- Spork: 0.5 oz titanium or lightweight plastic
- Water bottles: 1-3 oz collapsible or lightweight bottles
- Water treatment: 1-4 oz tablets, drops, or ultralight filter
Personal Care & Tools (0.5-1.5 pounds total)
- Toiletries: 2-4 oz travel-size essentials only
- Multi-tool: 2-6 oz depending on features needed
- Headlamp: 1-3 oz LED with extra batteries
- Sunglasses and sunscreen: 2-4 oz UV protection
Weight Distribution Strategy
The 10-15-20 Rule
- 10% of body weight: Ideal for experienced ultralight hikers
- 15% of body weight: Comfortable for most fit hikers
- 20% of body weight: Maximum recommended for sustained hiking
Pack Organization for Weight Efficiency
Bottom third: Sleeping system and extra clothes (light, compressible items)
Middle third: Food, stove, and dense items close to your back
Top third: Frequently accessed items like rain gear, snacks, map
Outside pockets: Water, trekking poles, wet items
Common Ultralight Mistakes and Solutions
Mistake #1: Going Too Light Too Fast
New ultralight hikers often cut too much weight without developing the skills to use minimal gear effectively.
The fix: Transition gradually. Start with one or two ultralight upgrades per season, building experience with each piece.
Mistake #2: Sacrificing Safety for Weight
Some hikers eliminate essential safety gear to hit arbitrary weight targets.
The fix: Never compromise on navigation, first aid, or emergency shelter. Find weight savings in comfort items instead.
Mistake #3: Ignoring Weather Conditions
Ultralight gear often has narrower safety margins than traditional equipment.
The fix: Research conditions thoroughly and adjust your gear list accordingly. Carry backup options for critical systems.
Mistake #4: Poor Gear Quality Choices
Cheap “lightweight” gear often weighs more than quality traditional gear and fails when you need it most.
The fix: Buy once, cry once. Invest in proven ultralight gear from reputable manufacturers.
Seasonal Ultralight Adjustments
Spring Hiking Modifications
Spring conditions demand flexibility as weather patterns shift rapidly.
- Add 2-3 oz for enhanced water resistance
- Include insect protection (1-2 oz)
- Pack extra fuel for cold morning cooking
- Consider microspikes for unexpected snow (6-8 oz)
Summer Ultralight Optimization
Summer offers the best opportunities for true ultralight hiking with minimal weather risks.
- Eliminate insulation layer on warm nights
- Switch to lightweight sun protection
- Reduce first aid kit for shorter trips
- Consider going stoveless with cold meals
Fall Transition Strategies
Fall weather unpredictability requires careful balance between weight and preparedness.
- Add warm layer flexibility
- Include waterproof options
- Plan for shorter daylight hours
- Consider emergency bivouac capabilities
Winter Ultralight Limitations
Winter hiking pushes ultralight philosophy to its limits, requiring careful risk assessment.
- Four-season shelter systems become essential
- Insulation requirements double or triple
- Emergency gear assumes greater importance
- Total pack weight may approach traditional loads
Advanced Ultralight Techniques
Multi-Use Gear Philosophy
Every item should serve multiple purposes. Your trekking poles become tent poles. Your smartphone serves as GPS, camera, emergency beacon, and entertainment. Your bandana works as first aid supply, pot holder, and washing cloth.
DIY Modifications and Repairs
Experienced ultralight hikers often modify commercial gear to save additional weight:
- Cut off unnecessary straps and tags (saves 1-3 oz)
- Replace stuff sacks with lighter alternatives
- Modify clothing for better ventilation
- Create custom-sized consumable containers
Consumable Weight Management
Food and water often outweigh your entire gear kit on longer trips.
Food strategies:
- Target 125-130 calories per ounce
- Prioritize calorie-dense options like nuts, oils, and dried fruits
- Plan precise portions to minimize waste
- Consider resupply points for extended trips
Water strategies:
- Know reliable water sources along your route
- Carry only what you need to the next source
- Use lightweight treatment methods
- Consider electrolyte supplements over sports drinks
Technology Integration for Modern Ultralight Hikers
Smartphone as Multi-Tool
Modern smartphones replace multiple traditional items:
- GPS unit and maps
- Camera and video recorder
- Weather forecasting
- Emergency communication
- Entertainment and e-books
Battery management: Carry a lightweight power bank (4-6 oz) for trips over 2-3 days.
Wearable Technology
Fitness trackers and smartwatches can replace separate devices while providing valuable health monitoring data during extended trips.
Ultralight Hiking Safety Considerations
Risk Assessment Framework
Ultralight hiking requires more careful risk evaluation than traditional backpacking.
- Environmental hazards: Weather, terrain, wildlife
- Equipment failure scenarios: What happens if key gear breaks?
- Personal limitations: Fitness level, experience, medical conditions
- Emergency response: How quickly can help arrive?
Emergency Protocol Adaptations
With lighter gear comes reduced margin for error. Establish clear protocols for various emergency scenarios:
Gear failure: Know field repairs for critical items Weather emergencies: Have backup shelter and warmth strategies
Injury scenarios: Carry appropriate first aid for your group size and trip distance Navigation problems: Always carry backup navigation methods
Building Your Ultralight Kit Progressively
Year One: Foundation Building
Start with the “Big Four” replacements, focusing on items that offer the largest weight savings:
- Shelter: Switch to trekking pole tent or tarp
- Sleep system: Upgrade to down quilt and lightweight pad
- Backpack: Move to frameless or minimal frame pack
- Clothing: Invest in lightweight, multi-use garments
Year Two: Refinement and Optimization
- Fine-tune gear selection: Replace items that didn’t perform well
- Add ultralight cooking system: Alcohol stove or minimal gas setup
- Optimize electronics: Smartphone integration, lightweight power solutions
- Develop repair and modification skills: Learn to customize gear
Year Three: Mastery and Specialization
- Season-specific optimization: Different kits for different conditions
- Route-specific planning: Tailor gear to specific trail requirements
- Advanced techniques: Stoveless cooking, alternative shelter systems
- Leadership skills: Help others transition to ultralight methods
Cost-Benefit Analysis of Going Ultralight
| Investment Level | Initial Cost | Weight Savings | Long-term Benefits |
|---|---|---|---|
| Starter Kit | $800-1200 | 8-12 lbs | Easier hiking, less fatigue |
| Intermediate Kit | $1500-2500 | 12-18 lbs | Extended range, faster recovery |
| Expert Kit | $2500-4000 | 15-25 lbs | Maximum performance, versatility |
Return on Investment
The financial investment in ultralight gear pays dividends through:
- Reduced physical therapy and injury costs
- Ability to tackle more ambitious routes
- Longer hiking career due to reduced joint stress
- Higher resale values for quality ultralight gear
According to the Appalachian Trail Conservancy, hikers with ultralight gear have 40% lower dropout rates on long-distance trails and report significantly higher satisfaction levels.
Regional Considerations for Ultralight Hiking
Pacific Crest Trail Adaptations
The PCT’s diverse climate zones require flexible ultralight strategies:
- Desert sections: Focus on sun protection and water management
- Sierra Nevada: Add snow travel and cold weather capabilities
- Cascade Range: Prioritize rain protection and warmth
Appalachian Trail Specifics
The AT’s consistent water sources and shelter system allow for more aggressive weight reduction:
- Smaller water carrying capacity needed
- Emergency shelter less critical near established shelters
- Focus on rain protection and humidity management
Continental Divide Trail Challenges
The CDT’s remote sections and variable weather require conservative ultralight approaches:
- Larger water carrying capacity essential
- Robust emergency shelter systems critical
- Navigation equipment assumes greater importance
Community and Resources
Online Communities
The ultralight hiking community offers extensive support for newcomers:
Reddit r/Ultralight: Active community with gear reviews and advice
Backpacking Light Forums: In-depth technical discussions
YouTube Channels: Video reviews and technique demonstrations
Shakedown Services
Many experienced ultralight hikers offer “shakedown” services, reviewing your complete gear list and suggesting improvements. These services typically cost $50-150 but can save hundreds in unnecessary purchases.
Key Takeaways
- Target base weight under 20 pounds for true ultralight benefits
- Focus on the “Big Four” items for maximum weight savings: shelter, sleep system, backpack, and clothing
- Never compromise safety equipment for weight savings—find cuts in comfort items instead
- Transition gradually, building skills with minimal gear over multiple seasons
- Multi-use items and smart material choices offer the best weight-to-function ratios
- Regional conditions and trip specifics should drive gear selection more than arbitrary weight targets
- Quality ultralight gear costs more upfront but provides better performance and durability
- Community support and education are essential for successful ultralight transitions
Step-by-Step Implementation Plan
Phase 1: Assessment and Planning (Weeks 1-2)
- Weigh your current gear: Create a detailed spreadsheet with every item
- Identify your hiking patterns: Trip length, seasons, regions you frequent
- Set realistic weight targets: Start with 25% reduction, build toward more aggressive goals
- Research gear options: Read reviews, join online communities, attend gear demonstrations
Phase 2: Strategic Upgrades (Months 1-6)
- Replace heaviest items first: Usually shelter, then sleep system
- Test new gear thoroughly: Start with day hikes, progress to overnight trips
- Learn new techniques: Practice with trekking pole shelters, minimal cooking systems
- Adjust and refine: Replace items that don’t meet expectations
Phase 3: Mastery and Optimization (Months 6-18)
- Fine-tune for specific conditions: Develop seasonal and regional gear lists
- Master advanced techniques: Stoveless cooking, alternative shelter systems
- Build repair and modification skills: Learn to customize gear for your needs
- Share knowledge: Help others make the ultralight transition
Environmental Impact of Ultralight Hiking
Leave No Trace Principles
Ultralight hiking aligns naturally with Leave No Trace ethics through reduced impact camping and minimal resource consumption.
Positive impacts:
- Less ground disturbance from lighter footsteps
- Reduced campsite impact from minimal gear spread
- Lower resource consumption in gear manufacturing
- Increased appreciation for natural environments
Sustainability Considerations
Choose gear from manufacturers committed to environmental responsibility. Look for:
- Recycled materials and sustainable manufacturing processes
- Repair services and take-back programs
- Local manufacturing to reduce transportation impact
- Durable designs that minimize replacement frequency
The Leave No Trace Center provides detailed guidelines for minimizing environmental impact while enjoying ultralight hiking adventures.
Conclusion
Your ultralight hiking gear checklist represents more than just a packing list—it’s a philosophy of intentional outdoor living. Every ounce you remove from your pack adds enjoyment to your trail experience.
Start with the big-ticket items where weight savings are most dramatic. Focus on proven gear from reputable manufacturers. Build your skills gradually as you transition to lighter, more minimal systems.
The goal isn’t to suffer with inadequate gear—it’s to carry exactly what you need, nothing more. When you achieve that balance, every step becomes lighter, every mile more achievable, and every adventure more memorable.
Remember: the best ultralight gear is the gear that gets you safely to your destination while maximizing your enjoyment of the journey. Choose wisely, pack intentionally, and embrace the freedom that comes with going light.
Frequently Asked Questions
Q: How much money should I budget for transitioning to ultralight hiking gear?
A: Plan $1,000-2,500 for a complete ultralight kit replacement. Start with the “Big Four” items (shelter, sleep system, pack, clothing) which typically cost $800-1,200 but provide the most dramatic weight savings. Spread purchases over 6-12 months to manage costs and test gear thoroughly.
Q: Is ultralight hiking safe for beginners?
A: Ultralight hiking requires more skill and experience than traditional backpacking. Beginners should start with one or two ultralight upgrades per season while building comfort with minimal gear. Never eliminate safety equipment until you’ve developed the skills to use lighter alternatives effectively.
Q: Can I go ultralight for winter hiking?
A: Winter ultralight hiking is possible but challenging. Four-season conditions require robust shelter, insulation, and emergency systems that significantly increase pack weight. Most winter ultralight setups still weigh 25-35 pounds base weight compared to 15-20 pounds for three-season hiking.
Q: How do I know if my pack is too heavy for ultralight hiking?
A: If your total pack weight (including food and water) exceeds 20% of your body weight, you’ll experience the fatigue and joint stress that ultralight hiking aims to eliminate. Start by weighing your current setup and identifying the heaviest items for replacement first.
Q: What’s the most important ultralight upgrade for maximum impact?
A: Shelter systems typically offer the largest single weight savings, often reducing pack weight by 3-5 pounds. A lightweight trekking pole tent or tarp system provides the best return on investment for most hikers transitioning to ultralight methods.